
I am so excited to share this Spooky Homemade Twix Bars Recipe with you because it's one of my absolute favorite treats to make when I want something deliciously festive yet comfortingly familiar. This recipe brings together that classic crunchy cookie base, luscious homemade caramel, and silky dark chocolate all topped off with fun candy eyeballs that make it perfect for Halloween or any spooky gathering. From the moment I taste the buttery caramel with just the right hint of apple cider to the satisfying snap of the chocolate coating, I know this recipe is a winner that will delight everyone who tries it.
Why You'll Love This Spooky Homemade Twix Bars Recipe
What makes this Spooky Homemade Twix Bars Recipe truly special to me is the way the flavors blend effortlessly—the deep caramel notes enriched with a touch of apple cider complement the rich dark chocolate perfectly. I appreciate how the buttery cookie crust adds that perfect crunch, creating a beautiful contrast of textures. It’s such a joy to bite into a bar that’s mellow, sweet, tangy, and completely indulgent all at once. The subtle flaky salt sprinkled into the caramel adds just enough balance, keeping each bite interesting and crave-worthy.
Beyond the incredible taste, I love how straightforward this recipe is to prepare. There’s no need for complicated techniques or specialty ingredients, just simple pantry staples that come together with ease. Plus, the addition of candy eyeballs is such a charming finishing touch that instantly makes these bars festive and playful. I often make them for Halloween parties, family get-togethers, or even just a cozy night in when I want a treat that’s as fun to make as it is to eat. They’re a guaranteed crowd-pleaser, and honestly, I always make extra because they disappear fast!
Ingredients You'll Need
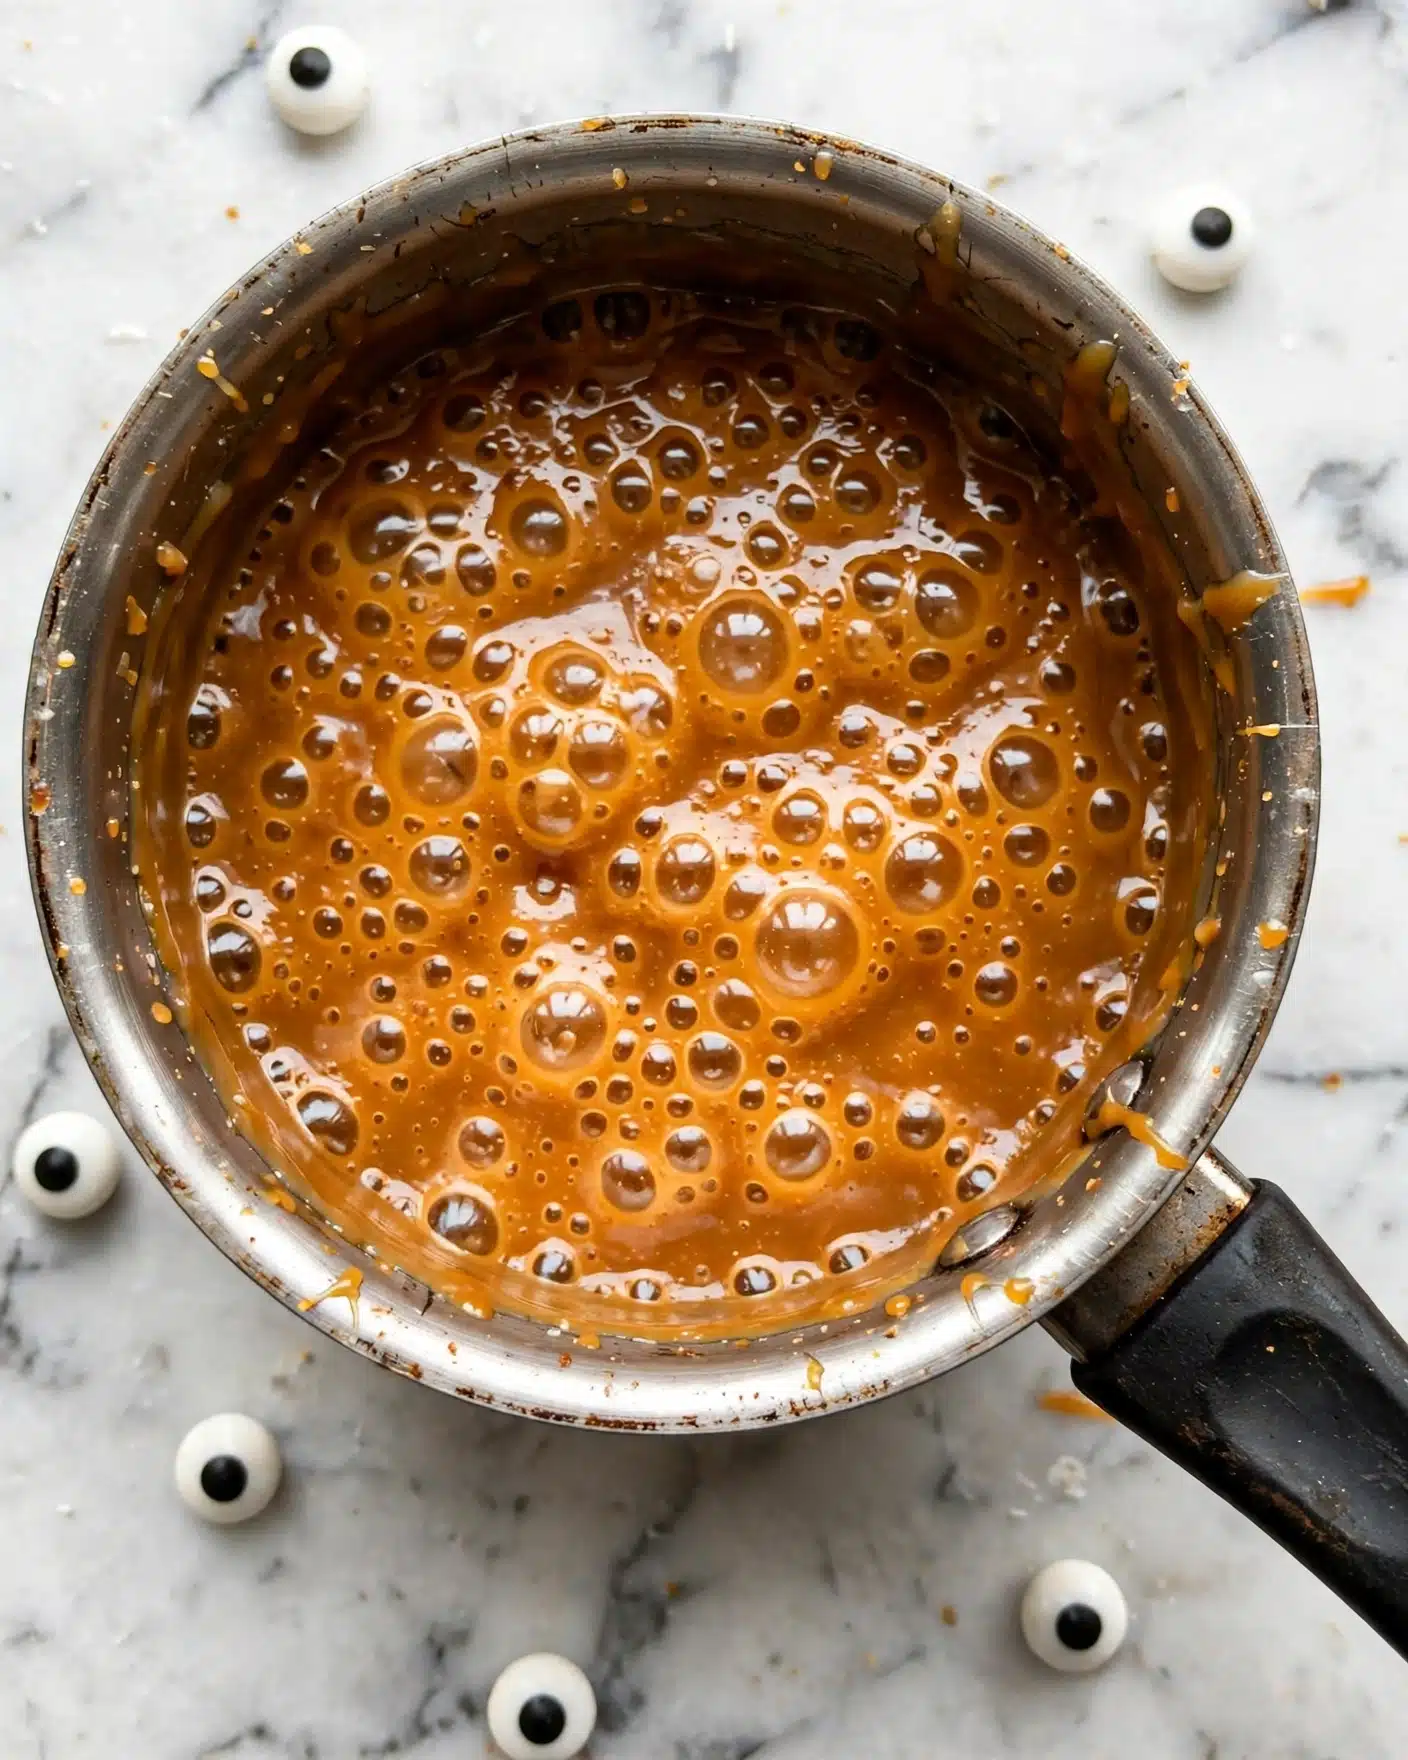
The ingredients for this Spooky Homemade Twix Bars Recipe are delightfully simple yet essential for achieving those wonderful flavors and textures. Each component plays a key role—from the creamy butter creating a tender cookie base to the apple cider adding a unique twist to the caramel, making it a truly standout treat.
- Dark brown sugar: Adds rich molasses flavor and depth to both the cookie and caramel layers.
- Salted butter: Provides moisture and richness to the cookie crust and caramel sauce.
- Vanilla extract: Enhances the sweetness and rounds out the flavor profile.
- Egg: Acts as a binder to hold the cookie dough together perfectly.
- All-purpose flour: Forms the sturdy but tender cookie base for the bars.
- Apple cider: Adds a subtle fruity tang and complexity to the caramel.
- Flaky salt: Balances the sweetness and brings out the caramel’s indulgent flavor.
- Dark chocolate: Coats the bars with a smooth, intense finish.
- Coconut oil: Helps melt the chocolate evenly and gives it a silky texture.
- Candy eyeballs: Perfect spooky decoration for a fun visual twist.
Directions
Step 1: Preheat your oven to 350° F and line a 9×9 inch baking dish with parchment paper to make removing the bars easier.
Step 2: To prepare the cookie dough, beat together the room temperature butter, dark brown sugar, and vanilla extract using an electric mixer until creamy. Then, add the egg and continue mixing until combined.
Step 3: Gradually add the all-purpose flour, mixing just until the dough forms a ball. If needed, add 1-2 tablespoons of water to help it come together without overworking the dough.
Step 4: Press the dough evenly into your prepared baking dish and bake for about 15 minutes or until the edges are golden and the top is set. Remove from oven and let cool slightly.
Step 5: While the cookie crust bakes, make the caramel by melting butter and dark brown sugar in a large pot over medium heat. Once melted, stir in the apple cider and bring the mixture to a boil. Stir constantly and cook until the caramel becomes thick, dark, and bubbly, about 9-10 minutes. Finally, stir in the flaky salt to balance the sweetness.
Step 6: Pour the hot caramel evenly over the baked cookie base, then chill in the fridge for at least 2 hours or freeze for 30 minutes until set and firm.
Step 7: Once firm, cut the caramel cookie base into 16 equal bars.
Step 8: Melt the chopped dark chocolate and coconut oil in the microwave in 30-second bursts, stirring frequently until smooth. Let it cool for about 10 minutes to thicken slightly for easier dipping.
Step 9: Dip or spread the melted chocolate over each bar, making sure they’re fully coated. Decorate with candy eyeballs right away while the chocolate is wet, then place the bars in the freezer for 10 minutes to set the chocolate quickly.
Step 10: Enjoy immediately or store the Spooky Homemade Twix Bars in the refrigerator. Let them sit at room temperature for about 15 minutes before serving so the flavors and textures are just right.
Servings and Timing
This recipe yields 16 delicious Spooky Homemade Twix Bars—perfect for sharing with friends or keeping a stash for yourself! The prep time is roughly 20 minutes, with 15 minutes of baking and about 10 minutes to melt chocolate. Caramel cooking takes 10 minutes, and chilling the bars for set will add around 2 hours, so plan accordingly. The total time including chilling is about 1 hour and 10 minutes of active work plus resting time.
How to Serve This Spooky Homemade Twix Bars Recipe
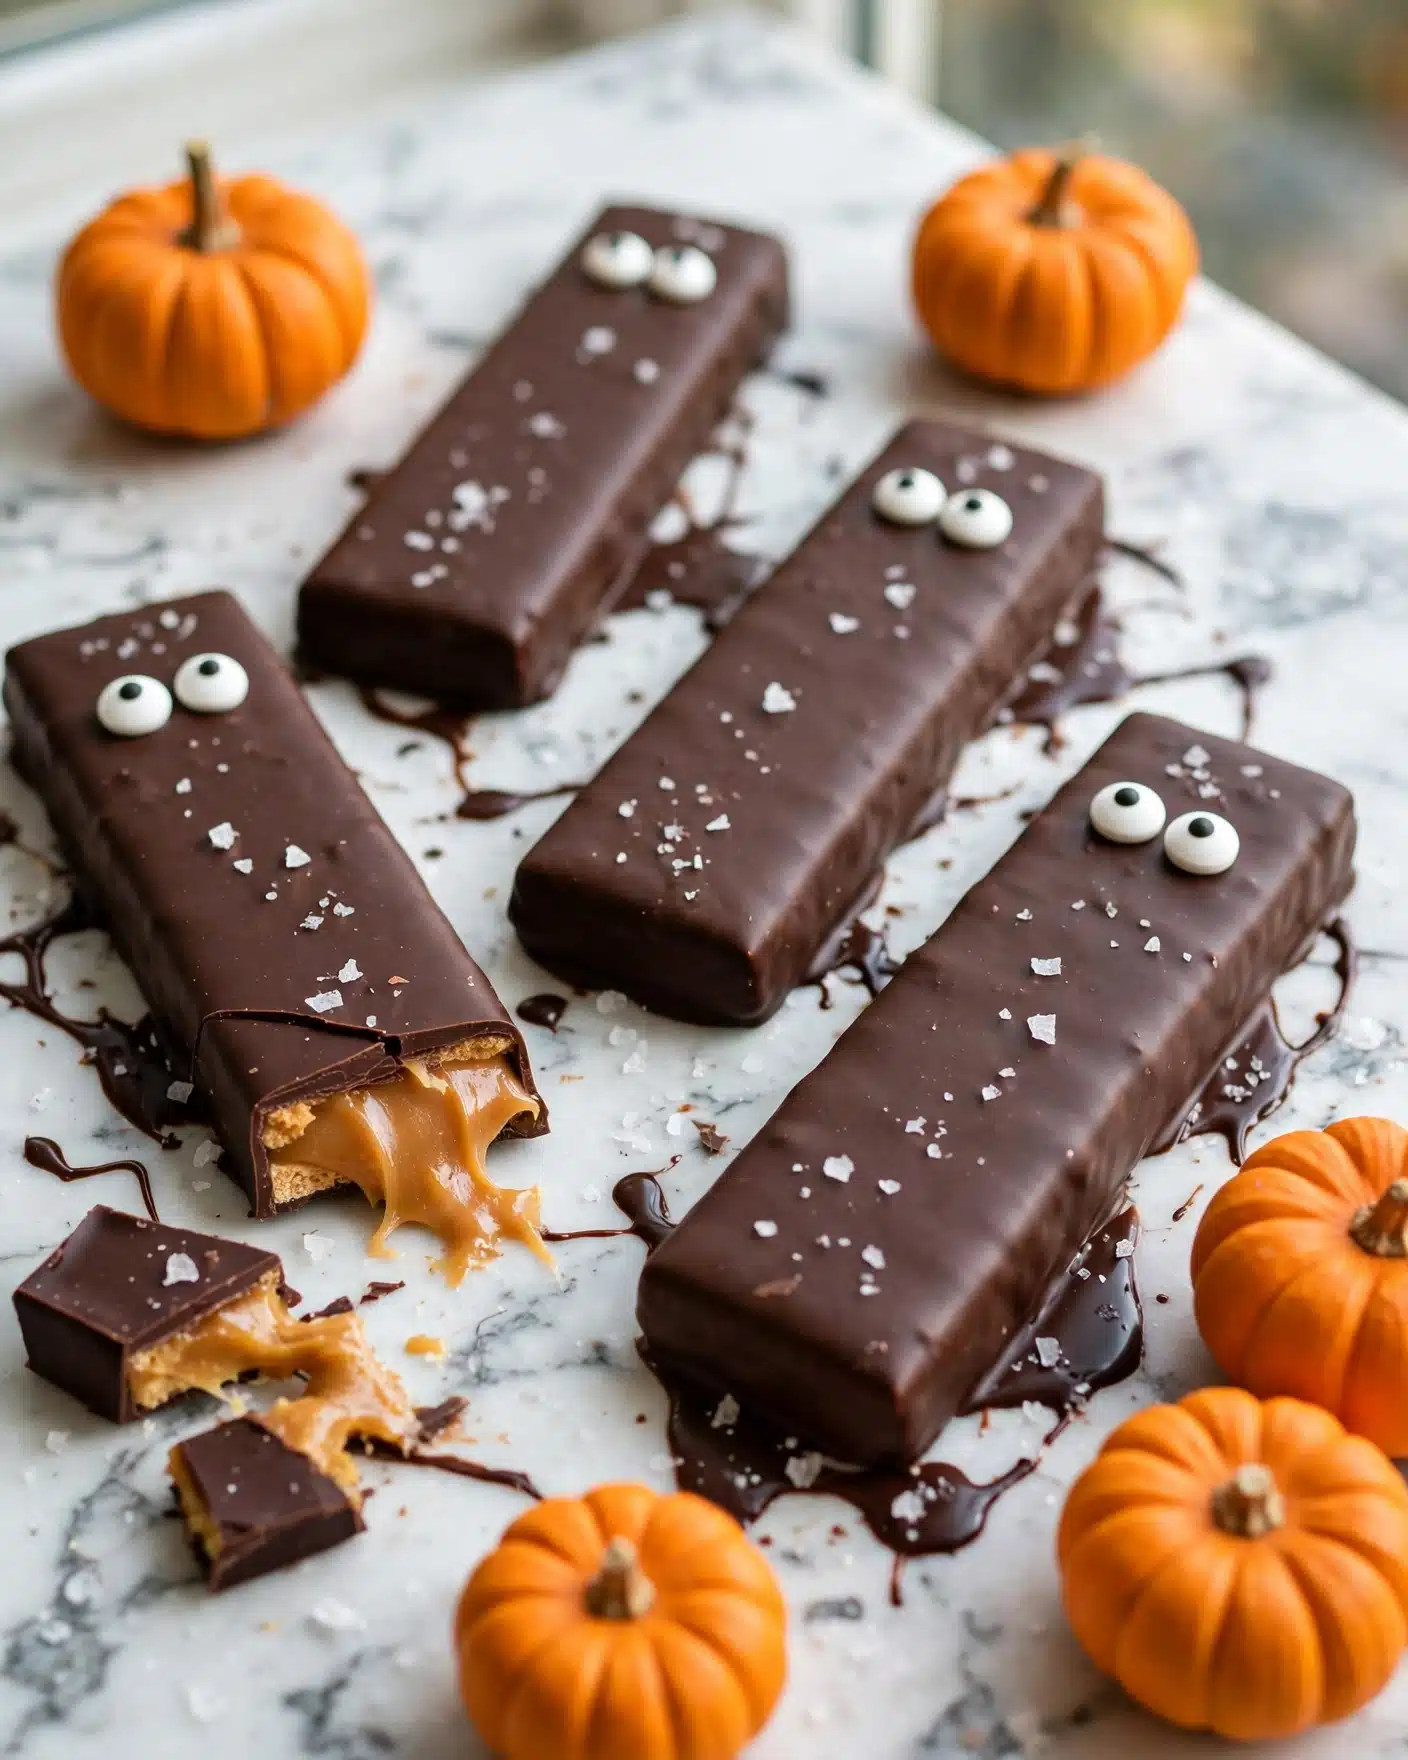
I love serving these bars chilled or at room temperature because it lets the chocolate have a satisfying snap while keeping the caramel pleasantly chewy. They pair beautifully with a warm cup of tea or coffee, making them ideal for autumn afternoons or as a sweet end to a cozy dinner with family. For Halloween parties, I arrange them on a festive platter surrounded by mini pumpkins or autumn leaves to create an inviting presentation that guests can’t resist.
If you want to get extra playful, you can garnish the bars with more candy eyeballs or even drizzle white chocolate across the top for an added decorative effect. I sometimes add a sprinkle of flaky sea salt right before serving to sharpen the flavors even more. These bars also make fantastic party favors when wrapped individually in parchment or cellophane tied with orange and black ribbons. They are perfect for sharing a little spooky sweetness!
For a crowd, I recommend portioning the bars into smaller sizes—bite-sized squares encourage everyone to grab a few and keep coming back for more. Whether it’s a family gathering, a festive holiday party, or just a quiet night craving something decadent, these Spooky Homemade Twix Bars always bring smiles and satisfying food nostalgia.
Variations
One of the best things about this Spooky Homemade Twix Bars Recipe is how versatile it is. If you want to tweak the recipe, you can easily substitute the all-purpose flour with a gluten-free blend to accommodate dietary needs without sacrificing texture or flavor. For a vegan twist, try replacing the butter with dairy-free margarine and use a flax egg instead of a regular egg—the caramel might need a little extra attention, but it can still come out beautifully.
Flavor-wise, I’ve experimented by swapping the dark chocolate for milk or white chocolate, which changes the tone of sweetness and pairs nicely with the apple cider caramel. Adding a pinch of cinnamon or pumpkin pie spice into the caramel elevates the autumn vibe and adds warmth. You can also try cooking the caramel with different fruit juices like pear or grape to change its profile.
As for cooking methods, if you don’t want to make the caramel from scratch, you could use a high-quality store-bought caramel sauce poured over the cookie base, then proceed with the chocolate dip. While I prefer the homemade way for authenticity and flavor, shortcuts are welcome for busy days. Just ensure the caramel layer sets firm before cutting and coating.
Storage and Reheating
Storing Leftovers
I store leftover Spooky Homemade Twix Bars in an airtight container in the refrigerator to keep the chocolate coating firm and the caramel fresh. They typically stay delicious for up to 5 days when refrigerated properly. I avoid stacking them directly to prevent sticking, using parchment or wax paper between layers if needed.
Freezing
You can absolutely freeze these bars! I wrap each bar individually in plastic wrap and then place them in a freezer-safe container or bag. They keep well frozen for up to 2 months. When you’re ready to enjoy, I recommend thawing them overnight in the fridge to preserve the chewy cookie and caramel texture without making the chocolate too soft.
Reheating
Since these bars have chocolate and caramel, I don’t recommend reheating them in the microwave or oven as it can cause the chocolate to melt unevenly and make the texture soggy. Instead, I bring them to room temperature by letting them sit out for about 15 minutes before eating, which restores the proper firmness and flavor balance. If you like warmer caramel, a light steam over a double boiler can gently warm a single bar but be careful to avoid melting the chocolate too much.
FAQs
Can I use light brown sugar instead of dark brown sugar?
Yes, you can swap light brown sugar for dark brown sugar if that’s what you have on hand. The flavor will be a little less intense and less molasses-rich, but the bars will still turn out deliciously caramel-y with a slightly lighter color in the caramel layer.
How do I get the caramel to thicken properly?
It’s important to cook the caramel mixture at a steady medium heat and stir constantly so it doesn’t burn. You’ll know it’s ready when it’s thick, dark in color, and bubbling briskly—usually around 9 to 10 minutes. If it’s too thin, it won’t set well on the cookie base.
Can I make these bars nut-free?
Absolutely! This recipe has no nuts in the ingredients, so it’s naturally nut-free. Just double check the candy eyeballs and chocolate for any potential cross-contamination if allergies are a concern.
What’s the best way to cut the bars after chilling?
I find the cleanest cuts come from using a very sharp knife warmed under hot water then dried before slicing. This helps the chocolate and caramel layers cut through smoothly without cracking or sticking.
Can I prepare these bars ahead of time for a party?
Definitely! I often make the bars a day or two in advance, store them in the fridge, and let them come to room temperature before serving. The flavors deepen and the texture remains wonderfully chewy, making it a convenient and crowd-pleasing dessert for celebrations.
Conclusion
I can’t recommend this Spooky Homemade Twix Bars Recipe enough if you’re looking for a fun, festive treat that combines classic flavors with a spooky twist. It’s easy to make, versatile, and always impresses guests with its layers of buttery cookie, rich caramel, and glossy chocolate—all topped off with candy eyeballs that bring a smile. Trust me, once you try these bars, you’ll want to make them every autumn and beyond!
PrintSpooky Homemade Twix Bars Recipe

These Spooky Homemade Twix Bars combine a buttery cookie base, rich apple cider caramel, and a decadent dark chocolate coating with whimsical candy eyeball decorations—perfect for Halloween treats or any fun occasion.
- Prep Time: 20 minutes
- Cook Time: 25 minutes
- Total Time: 1 hour 10 minutes
- Yield: 16 servings
- Category: Dessert
- Method: Baking
- Cuisine: American
Ingredients
Cookie Base
- ¼ cup dark brown sugar
- 1 stick (½ cup) salted butter, at room temperature
- 2 teaspoons vanilla extract
- 1 egg
- 1 ¼ cups all-purpose flour
Caramel
- 6 tablespoons salted butter
- 1 cup dark brown sugar, packed
- ½ cup apple cider
- 1 teaspoon flaky salt
Chocolate Coating
- 12 ounces dark chocolate, chopped
- 1 tablespoon coconut oil
Decoration
- Candy eyeballs
Instructions
- Preheat and Prepare: Preheat the oven to 350° F. Line a 9×9 inch baking dish with parchment paper to prevent sticking.
- Make the Cookie Dough: Using an electric mixer, beat the room temperature butter, ¼ cup dark brown sugar, and vanilla extract together until creamy. Add the egg and mix well. Gradually add the all-purpose flour and continue mixing until just combined. If needed, add 1-2 tablespoons of water to help the dough form a cohesive ball.
- Bake the Cookie Base: Press the dough evenly into the bottom of the prepared baking dish. Bake for 15 minutes until the crust is golden and set. Remove from oven and let cool slightly.
- Prepare the Caramel: In a large pot over medium heat, melt 6 tablespoons of salted butter and 1 cup of packed dark brown sugar. Once melted, add ½ cup apple cider. Bring the mixture to a boil while stirring constantly. Continue cooking for 9 to 10 minutes until the caramel darkens, bubbles, and thickens. Stir in 1 teaspoon flaky salt at the end for balance.
- Assemble the Layers: Pour the hot caramel evenly over the baked cookie crust. Place the baking dish in the refrigerator to chill for 2 hours or freeze for 30 minutes until the caramel layer is firm.
- Cut into Bars: Once firm, remove the slab from the dish using the parchment paper edges. Cut into 16 evenly sized bars.
- Melt Chocolate Coating: In the microwave, gently melt the chopped dark chocolate with 1 tablespoon of coconut oil, stirring every 20 seconds until smooth and fully melted. Allow to cool for 10 minutes so it’s not too hot for dipping.
- Dip and Decorate: Dip or cover each bar in the melted chocolate ensuring full coverage. Immediately decorate with candy eyeballs to create a spooky effect. Freeze the coated bars for 10 minutes to set the chocolate.
- Serve and Store: Enjoy immediately or store refrigerated. Before serving, bring bars to room temperature for about 15 minutes for optimal flavor and texture.
Notes
- Use parchment paper to make removing bars easier.
- Adjust water amount in dough to get the right consistency; dough should be just firm enough to press evenly.
- The apple cider adds unique flavor and moisture to the caramel.
- Chilling the caramel ensures clean cuts and prevents oozing.
- Use high-quality dark chocolate for best flavor and smooth coating.
- If you don’t have candy eyeballs, small candy decorations or sprinkles can be used instead.
- Allow bars to come to room temperature before serving for the best texture.


Leave a Reply