
I am absolutely in love with this Oven Fried Chicken Recipe because it combines all the crispy, golden goodness of traditional fried chicken without the fuss and mess of deep-frying. From the first bite, you get that perfect crunch followed by juicy, tender chicken inside, and I just can’t get enough of the way the garlic and paprika gently season each tender strip. Whether I’m cooking for a quick weeknight dinner or a casual get-together with friends, this recipe has become my go-to comfort food that never fails to impress.
Why You'll Love This Oven Fried Chicken Recipe
What makes this Oven Fried Chicken Recipe so special for me is the incredible flavor balance and texture. The crispy panko coating, enhanced with a hint of garlic and smoky paprika, gives it so much personality without overpowering the natural juicy flavor of the chicken. Baking the chicken in richly melted butter not only adds moisture but helps give that wonderful golden tint, which makes it look as good as it tastes.
Besides the incredible taste, I love how easy it is to prepare. This recipe doesn’t require any complicated techniques or hours in the kitchen—just a little dipping, coating, and baking, and you’re done. It’s perfect for busy weekdays when I want something satisfying without spending too much time, yet it’s impressive enough to serve when friends or family drop by. It really stands out because it’s a healthier twist on classic fried chicken that still delivers on crunch and flavor.
Ingredients You'll Need
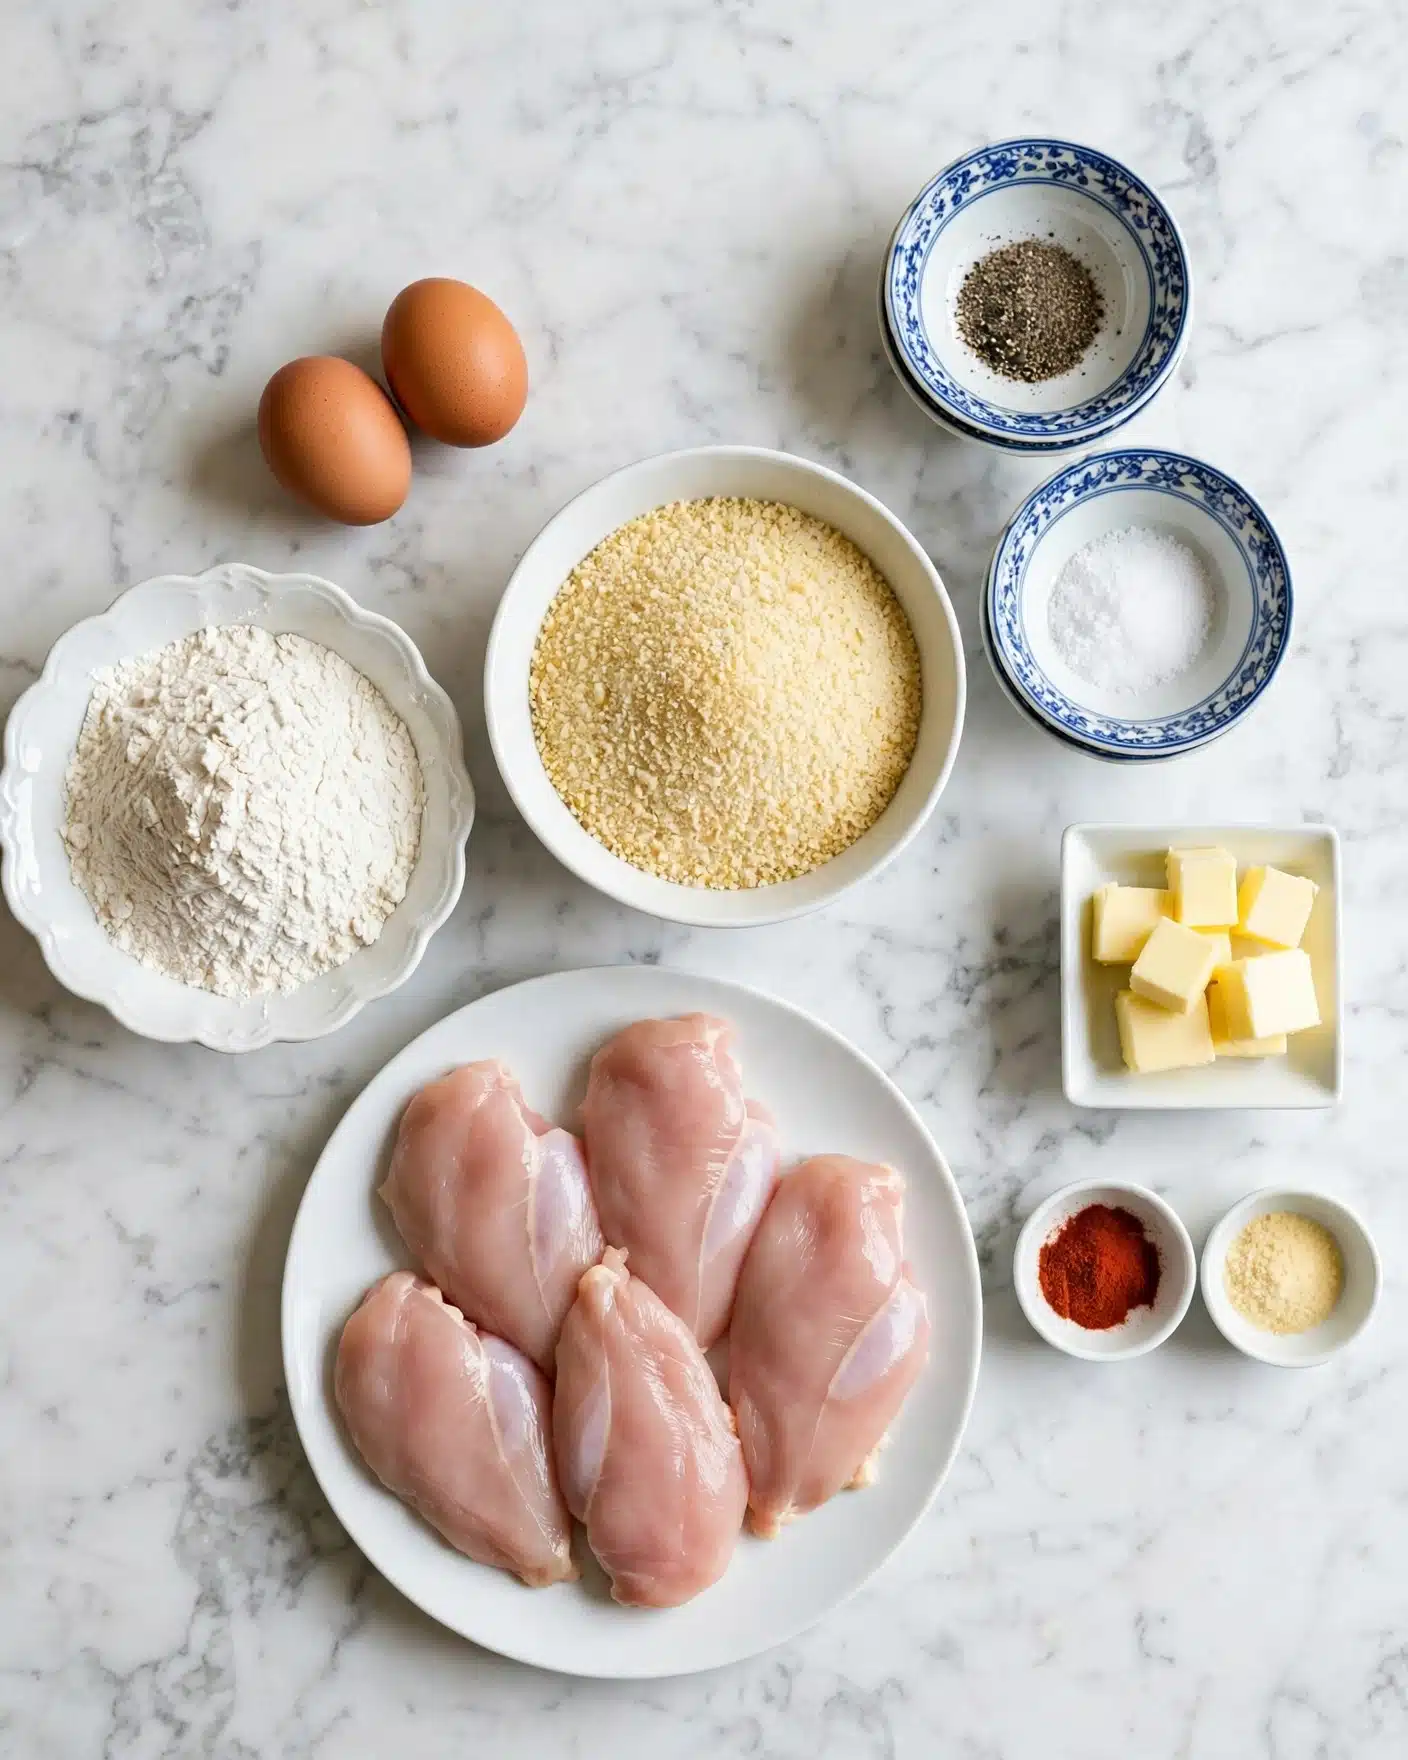
These ingredients are simple, straightforward, and each one plays an important role in building the final dish. From the buttery richness to the well-seasoned coating, every element comes together beautifully.
- Unsalted butter, 4 tablespoons: Melts nicely in the oven, adding richness and helping the chicken crisp up perfectly without frying.
- Large eggs, 2: Act as the binding agent for the breadcrumb coating, helping it stick firmly to the chicken strips.
- Panko breadcrumbs, 1 cup: Provide that light, airy crunch that sets this recipe apart from regular breadcrumbs.
- All-purpose flour, ½ cup: Adds structure to the coating and helps everything adhere smoothly.
- Salt, 1 teaspoon: Essential for enhancing all the flavors and seasoning the chicken thoroughly.
- Freshly ground black pepper, ½ teaspoon: Adds just the right amount of subtle heat and depth.
- Garlic powder, 1 teaspoon: Brings savory warmth that complements the chicken beautifully.
- Paprika, 1 teaspoon: Adds a gentle smoky flavor and vibrant color to the coating.
- Chicken breasts (boneless, skinless), 2 pounds: Cut into strips, these are the tender protein base of the dish.
Directions
Step 1: Preheat your oven to 425°F (220°C). Place a rimmed baking sheet inside the oven and add the unsalted butter to it, allowing the butter to melt completely. Carefully remove the hot pan and tilt it around so the butter coats the entire surface evenly—this step is key to getting a crispy bottom crust on the chicken.
Step 2: Crack the eggs into a shallow dish and beat them with a fork or whisk until smooth and even. This will be your dip for the chicken strips.
Step 3: In a separate shallow dish, combine the panko breadcrumbs, flour, salt, black pepper, garlic powder, and paprika. Mix these dry ingredients thoroughly so the seasoning is evenly distributed throughout the coating.
Step 4: Take each chicken strip and dip it first into the beaten egg, making sure it’s fully coated. Then roll the strip in the breadcrumb mixture, pressing gently to ensure the coating sticks well. This double step is essential for crispy, flavorful chicken.
Step 5: Place the coated chicken strips on the hot, buttered baking sheet, making sure to leave a little space between each piece. This spacing lets the heat circulate and helps the chicken crisp up rather than steam.
Step 6: Bake the chicken for 10 minutes, then carefully flip each strip to the other side and continue baking for another 10 minutes. You’re looking for a gorgeous golden brown color on the outside and an internal temperature of 165°F (74°C) to be sure the chicken is fully cooked.
Step 7: Take the chicken out of the oven and serve it immediately while it’s hot and juicy. If you want, sprinkle some fresh chopped parsley on top for a pop of color and freshness.
Step 8: Pair with your favorite dipping sauces like honey mustard or a tangy ranch. Sit down, relax, and enjoy the crunch and flavor of your perfectly cooked chicken strips.
Servings and Timing
This Oven Fried Chicken Recipe makes 4 servings, perfect for a family dinner or sharing with friends. Prep time takes about 10 minutes because most of the work is simply mixing ingredients and coating the chicken. The actual cook time is roughly 20 minutes, so from start to finish, you’re looking at around 30 to 35 minutes total. There’s no resting time needed, so you can dive right in and enjoy your meal quickly.
How to Serve This Oven Fried Chicken Recipe

When it comes to serving this dish, I love pairing it with sides that complement both the crispy texture and savory flavor. Creamy mashed potatoes or buttery corn on the cob are classic companions, but I also enjoy serving these chicken strips alongside a fresh, crisp green salad dressed with vinaigrette for a lighter contrast. Roasted vegetables or sweet potato fries are fantastic if you want to keep things homey and comforting.
For presentation, I often arrange the chicken strips neatly on a large platter and sprinkle freshly chopped parsley over them—it instantly brightens the dish and makes it look restaurant-quality. You can serve the chicken with little bowls of dipping sauces on the side to keep everyone happy—anything from a simple honey mustard to a spicy sriracha mayo works wonders. I find that serving the chicken hot or just warm keeps that crispy crust intact, so I usually plate it right out of the oven when possible.
This recipe is incredibly versatile for different occasions. It’s perfect for a casual weeknight dinner when you want something quick but delicious, and it’s also a hit for parties, potlucks, or even holiday gatherings when you want to offer comfort food everyone loves without spending hours over the stove. Portions of 3-4 strips per person are usually enough depending on appetite, but it’s easy to scale up for bigger crowds.
Variations
One of the things I find exciting about this Oven Fried Chicken Recipe is how easy it is to customize depending on your tastes or dietary needs. For instance, if you prefer a gluten-free version, swapping the all-purpose flour and panko breadcrumbs for gluten-free alternatives works beautifully. Just make sure your gluten-free breadcrumbs have a light texture to maintain that crunch I love.
If you want to play with flavor, you can experiment by adding different spices to the breadcrumb mix. A bit of cayenne pepper adds heat, or a sprinkle of dried herbs like thyme and oregano can bring an earthy twist. For those who want a deeper smoky profile, smoked paprika is fabulous instead of regular paprika. You could even try letting the chicken marinate in buttermilk beforehand for extra tenderness and tang.
For a different cooking method, I sometimes try this recipe using an air fryer instead of the oven for an even quicker result with minimal oil. Cooking times are slightly shorter, and the air fryer helps maintain that unbeatable crunch. No matter how you tweak it, this recipe holds up really well and always delivers on flavor and texture.
Storage and Reheating
Storing Leftovers
If you have any leftover Oven Fried Chicken, I always recommend storing it in an airtight container to keep it as fresh as possible. Plastic or glass containers work well. Refrigerate within two hours of cooking, and it should stay good for about 3 to 4 days. Keeping the chicken separate from any dipping sauces prevents the coating from getting soggy.
Freezing
This recipe can be frozen, too, which is a lifesaver for busy days. To freeze, I let the chicken cool completely, then place the strips on a parchment-lined baking sheet to freeze individually before transferring them to a freezer-safe zip-top bag or container. This way, they don’t stick together. Frozen chicken strips will keep well for up to 2 months. When you're ready, thaw overnight in the fridge before reheating for best results.
Reheating
Reheating my Oven Fried Chicken is best done in an oven or toaster oven to bring back that crispy exterior. I preheat to 375°F (190°C) and heat the chicken on a wire rack set over a baking sheet for about 8-10 minutes, flipping halfway through. Avoid microwaving if you want to keep the crunch because it tends to make the coating soggy. Reheating this way delivers almost freshly baked texture and flavor every time.
FAQs
Can I use chicken thighs instead of breasts in this Oven Fried Chicken Recipe?
Absolutely! Chicken thighs are a great alternative and tend to be juicier and more forgiving if you’re worried about drying out the meat. Just cut them into similar-sized strips for even cooking and follow the same coating and baking steps.
Is it possible to make this recipe dairy-free?
Yes, you can easily make this dairy-free by substituting the butter with a dairy-free alternative like olive oil or a plant-based margarine. The coating will still crisp up nicely, though the flavor will be slightly different but still delicious.
Can I prepare the chicken strips ahead of time?
You sure can. I often coat the chicken strips and keep them covered in the fridge for a few hours before baking. This is especially helpful if you want to get a head start on dinner prep. Just bake them straight from the fridge—adding an extra minute or two to the cooking time if needed.
What dipping sauces do you recommend with this Oven Fried Chicken Recipe?
Some of my favorites include honey mustard, ranch, garlic aioli, or even a simple ketchup-based sauce with a dash of hot sauce for a spicy kick. You can mix and match depending on your mood or the occasion.
Can I double the recipe for larger groups?
Definitely! Just use a larger baking sheet or multiple sheets to make sure the chicken strips are spaced out properly. Overcrowding the pan will steam the chicken and prevent that crisp crust I love.
Conclusion
I truly hope you give this Oven Fried Chicken Recipe a try because it has quickly become one of my all-time favorite meals that’s simple, flavorful, and so satisfying. It’s perfect for any day when you want that classic fried chicken taste without the hassle or guilt. Once you taste that crispy coating alongside juicy, tender chicken, I’m confident it’ll become one of your kitchen staples too.
PrintOven Fried Chicken Recipe

Oven Fried Chicken offers a crispy, golden-brown coating without the mess of deep frying. This recipe uses panko breadcrumbs and a fragrant blend of spices, baked to perfection in the oven with a buttery base for rich flavor. Perfect for a quick and healthier twist on traditional fried chicken, it’s an easy dinner that’s crispy on the outside and juicy on the inside.
- Prep Time: 10 minutes
- Cook Time: 20 minutes
- Total Time: 30 minutes
- Yield: 4 servings
- Category: Main Course
- Method: Baking
- Cuisine: American
Ingredients
Butter
- 4 Tablespoons unsalted butter
Egg Wash
- 2 large eggs
Coating
- 1 cup panko breadcrumbs
- ½ cup all-purpose flour
- 1 teaspoon salt
- ½ teaspoon freshly ground black pepper
- 1 teaspoon garlic powder
- 1 teaspoon paprika
Protein
- 2 pounds chicken breasts (boneless, skinless, cut into strips)
Instructions
- Preheat and Prepare Baking Sheet: Preheat the oven to 425°F (220°C). Place a rimmed baking sheet inside the oven with the butter on it to melt the butter evenly. When melted, carefully remove the pan and tilt it to spread the butter evenly across the surface.
- Prepare Egg Wash: Crack the eggs into a shallow dish and beat them until smooth to create the egg wash.
- Mix Coating Ingredients: In another shallow dish, combine the panko breadcrumbs, all-purpose flour, salt, freshly ground black pepper, garlic powder, and paprika to make the seasoned coating.
- Coat Chicken Strips: Dip each chicken strip into the beaten eggs, then dredge it in the breadcrumb mixture, pressing gently to ensure the coating sticks well.
- Arrange on Baking Sheet: Place the breaded chicken strips carefully onto the hot, butter-coated baking sheet, spacing them apart to allow even cooking and crisping.
- Bake the Chicken: Bake the chicken strips in the preheated oven for 10 minutes. Then flip each strip over and bake for an additional 10 minutes, or until the coating is golden brown and the internal temperature of the chicken reaches 165°F (74°C).
- Serve: Remove the chicken from the oven and serve immediately. Optionally, garnish with fresh parsley and serve alongside your favorite dipping sauce for added flavor and presentation.
Notes
- Using panko breadcrumbs helps achieve an extra crispy crust.
- Ensure the oven and baking sheet are preheated for optimal crispiness.
- Use a meat thermometer to confirm chicken's internal temperature reaches 165°F (74°C) for safe consumption.
- For added flavor, try seasoning the chicken strips with a pinch of cayenne or smoked paprika.
- Serve with dipping sauces like ranch, honey mustard, or spicy mayo for variety.




Leave a Reply