
I absolutely adore Magnolia Bakery's Famous Banana Pudding Recipe because it strikes that perfect balance between creamy sweetness and tender banana goodness. Every spoonful feels like a comforting hug—rich vanilla pudding layered with just-ripe bananas and those irresistible Nilla Wafers create a texture that is both silky and delightfully crunchy. I’ve found that making this recipe is not only super rewarding but also surprisingly simple, and it never fails to impress guests or brighten up a cozy night in. It’s truly a dessert that feels like a little celebration in a bowl.
Why You'll Love This Magnolia Bakery's Famous Banana Pudding Recipe
From the moment I first tasted this banana pudding, I knew it was something special. The flavor profile balances creamy sweetness from the whipped pudding with the mild, natural sugar of the bananas and the gentle crunch of the Nilla Wafers. It’s not overly sweet, which I really appreciate, and the vanilla notes are so comforting and nostalgic. It’s like the perfect childhood dessert but elevated to a decadent level that adults will crave just as much.
I also love how easy it is to prepare, especially given the impressive layers of flavor and texture. Most of the work is hands-off—you just need to mix, assemble, and chill. I always plan ahead because the chilling time is essential for letting those layers meld together beautifully. Whether I’m serving it at a family gathering, a casual potluck, or just indulging on a quiet weekend, this banana pudding recipe feels special without requiring hours in the kitchen. It’s a true crowd-pleaser and a dessert I happily recommend to anyone looking for a delicious classic with a twist.
Ingredients You'll Need
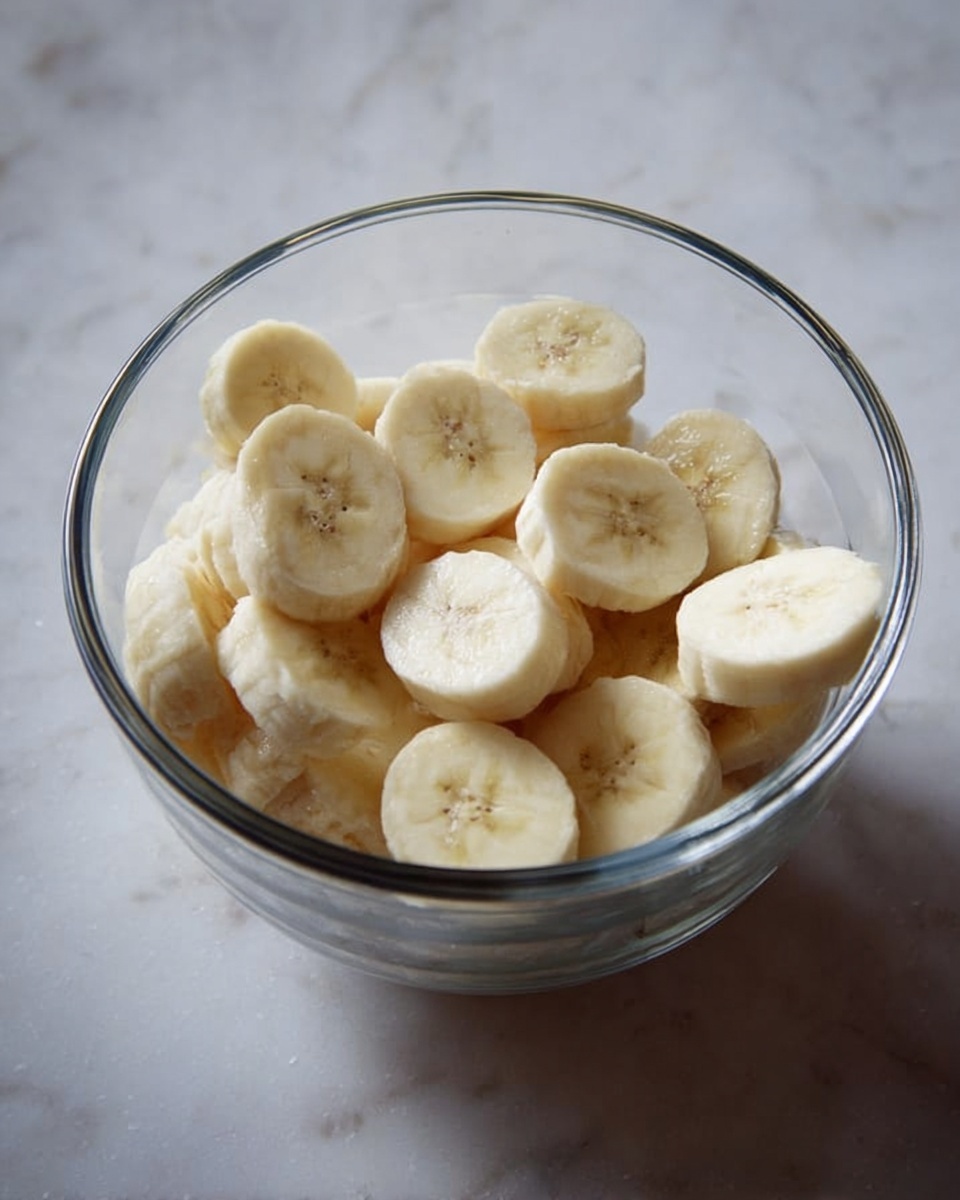
All the ingredients for this recipe are simple but essential, each adding an important element that brings the pudding to life. From the creamy base to the fresh banana layers and crunchy wafers, the ingredients work harmoniously to create both flavor and texture.
- Sweetened condensed milk: Provides rich sweetness and a creamy foundation that makes the pudding luscious.
- Ice cold water: Ensures the instant pudding mix sets perfectly, giving a smooth texture.
- Instant vanilla pudding mix: The star flavor component that makes the pudding taste irresistibly vanilla-rich.
- Heavy cream: Whipped to stiff peaks, it adds lightness and a fluffy texture that elevates the pudding.
- Barely ripe bananas: Their sweetness balances the pudding; I prefer them slightly firm so they hold up well in layers.
- Nilla Wafers: These provide a nostalgic, crunchy contrast that softens just enough after chilling for perfect bites.
Directions
Step 1: In a large bowl, beat together the sweetened condensed milk and ice cold water for about one minute until well combined. Then add the instant vanilla pudding mix and beat for an additional two minutes until smooth. Cover the bowl and refrigerate it for 3 to 4 hours or overnight. Trust me, this resting time is absolutely crucial because the pudding needs to set properly—it will be watery if rushed.
Step 2: While the pudding is chilling, whip the heavy cream in a separate large bowl until stiff peaks form. Take your time here until you see those peaks hold firm when you lift the whisk, which adds a luxurious lightness to the final mixture.
Step 3: Gently fold the whipped cream into the set pudding mixture, mixing just enough to combine without losing the airy texture. The result should be a fluffy, creamy delight with no streaks of pudding left.
Step 4: Now, get ready to assemble your pudding. You can either use a large glass bowl with at least a 4-5 quart capacity or individual serving dishes—both look fantastic. Start by covering the bottom with ⅓ of the Nilla Wafers, overlapping if needed to create a solid base.
Step 5: Layer ⅓ of the sliced bananas evenly over the wafers, then spoon ⅓ of the creamy pudding mixture on top of that. Repeat these layers twice more, finishing with wafers or crushed wafer crumbs to create an inviting textured top.
Step 6: Cover the assembled pudding tightly with plastic wrap or a lid and place it in the refrigerator to chill for at least 4 hours, up to 8 hours. This chilling is essential to allow the flavors to meld and the wafers to soften just enough without becoming soggy. Avoid leaving it longer than 8 hours to keep your bananas from browning.
Servings and Timing
This recipe makes about 15 generous servings, perfect for large gatherings or special celebrations. The prep time is roughly 20 minutes, but the pudding needs to rest in the fridge for 3 to 4 hours to set before folding in whipped cream. After assembly, another 4 to 8 hours of chilling is required to achieve the best texture. So while the active cooking is short, plan for a total time of around 7 hours and 15 minutes. The longer chilling time results in a beautifully melded dessert that’s worth every minute of patience.
How to Serve This Magnolia Bakery's Famous Banana Pudding Recipe
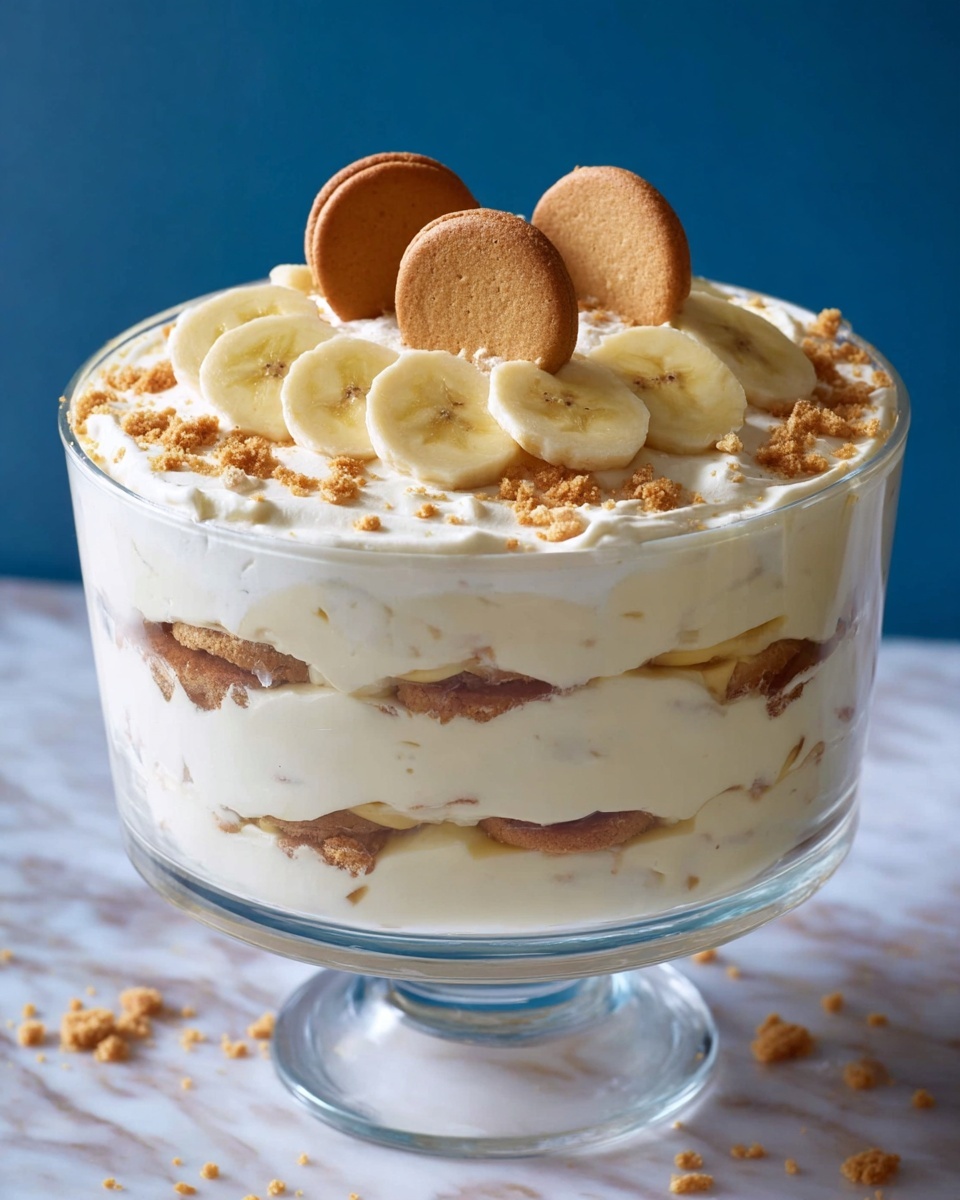
I like serving this pudding chilled straight from the fridge because the cold temperature really helps each layer shine, balancing the creamy pudding with the soft banana slices and tender wafers. It’s delicious on its own, but for a little extra flair, I sometimes garnish it with freshly sliced bananas or a sprinkle of crushed wafers right before serving to add visual appeal and a bit of crunch.
When I want to elevate the presentation for a party, I serve it in individual clear glass cups or mason jars to show off the beautiful layers. It also pairs wonderfully with fresh berries or a dollop of lightly sweetened whipped cream for an extra touch. I’ve found it works perfectly as a make-ahead dessert for family dinners, holidays, or casual get-togethers because it’s just as impressive as it is effortless.
For beverage pairings, I’m a fan of light, refreshing drinks that complement the pudding’s creamy sweetness. An iced herbal tea or a sparkling water with lemon can brighten the flavors. No matter the occasion, this banana pudding always feels like a delightful treat that brings everyone to the table with smiles.
Variations
I love customizing this recipe depending on what I have on hand or the dietary needs of friends. For a gluten-free version, simply swap out Nilla Wafers for gluten-free vanilla cookies—you get that crunch without sacrificing flavor. If you want to tweak the flavor, adding a splash of banana liqueur to the pudding mixture can give it an extra punch of banana intensity that I find irresistible.
For those avoiding dairy, I have experimented with coconut cream whipped in place of heavy cream and a dairy-free instant vanilla pudding mix. While the texture differs slightly, it’s a fantastic vegan twist that still celebrates all the flavors I adore about the original.
If you’re feeling adventurous, try swapping the bananas for sliced strawberries or peaches for a fruit variation that pairs beautifully with vanilla. You can even add a layer of toasted pecans or almonds for a nutty crunch. I’ve never baked this pudding, but some friends enjoy the chilled layers warmed slightly in the microwave for a cozy twist before serving.
Storage and Reheating
Storing Leftovers
After enjoying this banana pudding, I always store any leftovers in an airtight container or tightly covered with plastic wrap to keep the pudding from absorbing fridge odors. Because of the fresh bananas, I recommend eating leftovers within 2 to 3 days for the best taste and texture before the bananas start to brown and turn mushy.
Freezing
While freezing banana pudding isn’t something I do often, it’s possible to freeze it if you need to extend its shelf life. I suggest using a freezer-safe container and freezing it without the wafer topping, as the texture doesn’t hold up well after thawing. When ready to eat, thaw it overnight in the refrigerator. Keep in mind that the bananas will soften further, and the texture may be a bit different, but the pudding flavor will still shine through for about 1 month frozen.
Reheating
I typically enjoy this pudding cold or at room temperature, but if you prefer it a bit warmer, gently let it sit out for 15 to 20 minutes to take the chill off. I avoid microwaving it directly because the cream can separate, and the wafers may lose their delicate texture. If you want to serve it warm, try spooning a portion into a small bowl and briefly warming it on very low power for just a few seconds, checking often to avoid overheating.
FAQs
Can I use fresh homemade pudding instead of instant pudding mix?
Absolutely! If you prefer making pudding from scratch, you can substitute homemade vanilla pudding for the instant mix. Just be sure it’s chilled and thickened before folding in the whipped cream so you retain that perfect creamy texture.
What’s the best way to prevent bananas from browning in this recipe?
I recommend using barely ripe bananas because they hold their shape and color better. Also, assembling the pudding shortly before serving and refrigerating it helps minimize browning. If you want extra protection, you can toss banana slices in a little lemon juice before layering, but I usually skip this to keep the flavor pure.
Can I prepare this pudding in advance for a party?
Yes! In fact, this recipe benefits from being made a day ahead, allowing those flavors to meld beautifully. Just remember to wait to add the banana slices if you want to keep them bright or assemble the entire dessert up to 8 hours before serving to avoid banana browning.
Is it necessary to whip the heavy cream to stiff peaks?
Yes, whipping the cream to stiff peaks is important for the right fluffy and airy texture. If it’s under-whipped, the pudding will be too dense; over-whipping can cause it to break, so I recommend watching closely when whipping.
Can I substitute another type of cookie for the Nilla Wafers?
Definitely! Vanilla wafers are traditional, but you can substitute graham crackers, shortbread, or even ladyfingers depending on your preference. Just keep in mind the texture will alter slightly, so choose a cookie that softens nicely without becoming mushy.
Conclusion
If you’re looking for a genuinely delightful dessert that feels both nostalgic and special, I wholeheartedly encourage you to try Magnolia Bakery's Famous Banana Pudding Recipe. It’s one of those rare dishes that’s easy to make, absolutely delicious, and always a hit with family and friends. Once you taste that creamy, vanilla-infused pudding paired with fresh bananas and crumbly wafers, I promise it will become one of your go-to desserts, just like it did for me.
PrintMagnolia Bakery's Famous Banana Pudding Recipe
Magnolia Bakery's Famous Banana Pudding is a classic, creamy, and indulgent dessert featuring layers of instant vanilla pudding, whipped cream, sliced bananas, and crunchy Nilla Wafers. This no-bake treat is chilled to perfection, making it a refreshing and crowd-pleasing dessert perfect for gatherings or family meals.
- Prep Time: 15 minutes
- Cook Time: 0 minutes
- Total Time: 7 hours 15 minutes
- Yield: 15 servings
- Category: Dessert
- Method: No-Cook
- Cuisine: American
Ingredients
Pudding Mixture
- 1 (14 oz) can sweetened condensed milk
- 1 ½ cups ice cold water
- 1 (3.4 oz) box instant vanilla pudding mix
Whipped Cream
- 3 cups heavy cream
Other Ingredients
- 4 cups sliced barely ripe bananas
- 1 (12 oz) box Nilla Wafers
Instructions
- Prepare the pudding base: In a large bowl, beat together the sweetened condensed milk and 1 ½ cups ice cold water until well combined, about 1 minute. Then add the instant vanilla pudding mix and continue beating for about 2 minutes. Cover this mixture and refrigerate for 3-4 hours or overnight to allow it to properly set. This step is crucial as the pudding mixture will be watery if it does not set long enough.
- Whip the cream: In a separate large bowl, whip the 3 cups of heavy cream until stiff peaks form. Carefully fold the whipped cream into the chilled pudding mixture gently until no streaks remain, creating a light and creamy filling.
- Prepare the serving dish: You can assemble the dessert either in individual portions or in a large glass bowl with a 4-5 quart capacity (a 9x13 baking dish also works well).
- Assemble the banana pudding: Start by arranging ⅓ of the Nilla Wafers to cover the bottom, overlapping as needed. Add ⅓ of the sliced bananas on top of the wafers, and then spread ⅓ of the pudding mixture over the bananas. Repeat this layering process two more times, finishing with a layer of wafers or wafer crumbs on top.
- Chill before serving: Cover the assembled dessert tightly and refrigerate for at least 4 hours and up to 8 hours. This chilling time allows the flavors to meld and the wafers to soften perfectly. Do not chill longer than 8 hours to prevent the bananas from browning excessively.
Notes
- Use barely ripe bananas for the best flavor and to minimize browning.
- To prevent bananas from browning, you can toss them lightly with lemon juice before layering.
- The pudding mixture must be refrigerated adequately to set properly to avoid a watery texture.
- This dessert is best consumed within 8 hours of assembly for optimal freshness and texture.


Leave a Reply