
I absolutely love sharing this Chocolate Mummy Cookies Recipe with you because it perfectly captures both the cozy, rich flavor of chocolate and the playful spirit of Halloween. These cookies are soft yet wonderfully fudgy thanks to the almond flour and cocoa powder, and the peanut butter adds that unbeatable nutty warmth I adore. Decorating them with white chocolate “bandages” and those spooky edible eyes is always a fun part for me, especially when baking with friends or family. Every bite feels like a festive treat, and I can’t wait for you to experience the joy they bring as much as I do.
Why You'll Love This Chocolate Mummy Cookies Recipe
What truly excites me about this Chocolate Mummy Cookies Recipe is the way the flavors come together so beautifully. The almond flour and cocoa powder create this deep chocolate intensity, while the peanut butter rounds it out with a creamy, nutty undertone that makes these cookies feel indulgently satisfying but not overly sweet. I also love how the coconut sugar gives a subtle caramel hint that balances perfectly. When you bite into one, you get that soft yet slightly chewy texture that’s just irresistible.
Another thing I appreciate is how straightforward the preparation is. If you’ve ever been intimidated by a dessert that looks fancy but requires a million ingredients, this one is a relief—it’s surprisingly simple! Plus, setting the oven, mixing, scooping, and decorating can easily fit into a cozy afternoon or a festive get-together. I’ve found these cookies are ideal for Halloween parties, school events, or even a fun weekend treat with the kids. What makes them stand out to me is not just how delicious they are but how much joy they bring when decorating—those white chocolate bandages add that perfect spooky, creative twist that everyone loves.
Ingredients You'll Need
All the ingredients in this recipe are simple, wholesome, and add something special to the cookies’ flavor, texture, and appearance. Each one plays a vital role to make sure your cookies turn out just right—rich, soft, and perfectly chocolatey with that delightful nutty depth.
- Peanut butter or nut butter: Provides creaminess and a rich, nutty flavor that complements the chocolate perfectly.
- Eggs: Helps bind the ingredients and gives the cookies structure and moisture.
- Vanilla extract: Adds warmth and enhances the overall flavor complexity.
- Almond flour: Creates a soft, tender crumb with a subtle nutty undertone.
- Unsweetened cocoa powder: Brings deep, rich chocolate flavor without overpowering sweetness.
- Baking soda: Gives the cookies a gentle lift and light texture.
- Coconut sugar: Offers natural sweetness with mild caramel notes and keeps the cookies moist.
- Salt: Balances sweetness and amplifies the chocolate and peanut butter flavors.
- Chocolate chips: Provides pockets of melty chocolate for extra indulgence and texture.
- Edible candy eyeballs: The fun component that gives these cookies their spooky mummy look.
- White chocolate chips: Melted to create the iconic mummy "bandages" and used to attach the candy eyes.
Directions
Step 1: Preheat your oven to 375 degrees Fahrenheit and line a baking sheet with parchment paper or aluminum foil. This helps prevent sticking and makes cleanup easy.
Step 2: In a large bowl, combine the peanut butter, eggs, and vanilla extract. Mix them thoroughly until smooth and well incorporated. This base ensures your cookies have that rich, creamy texture.
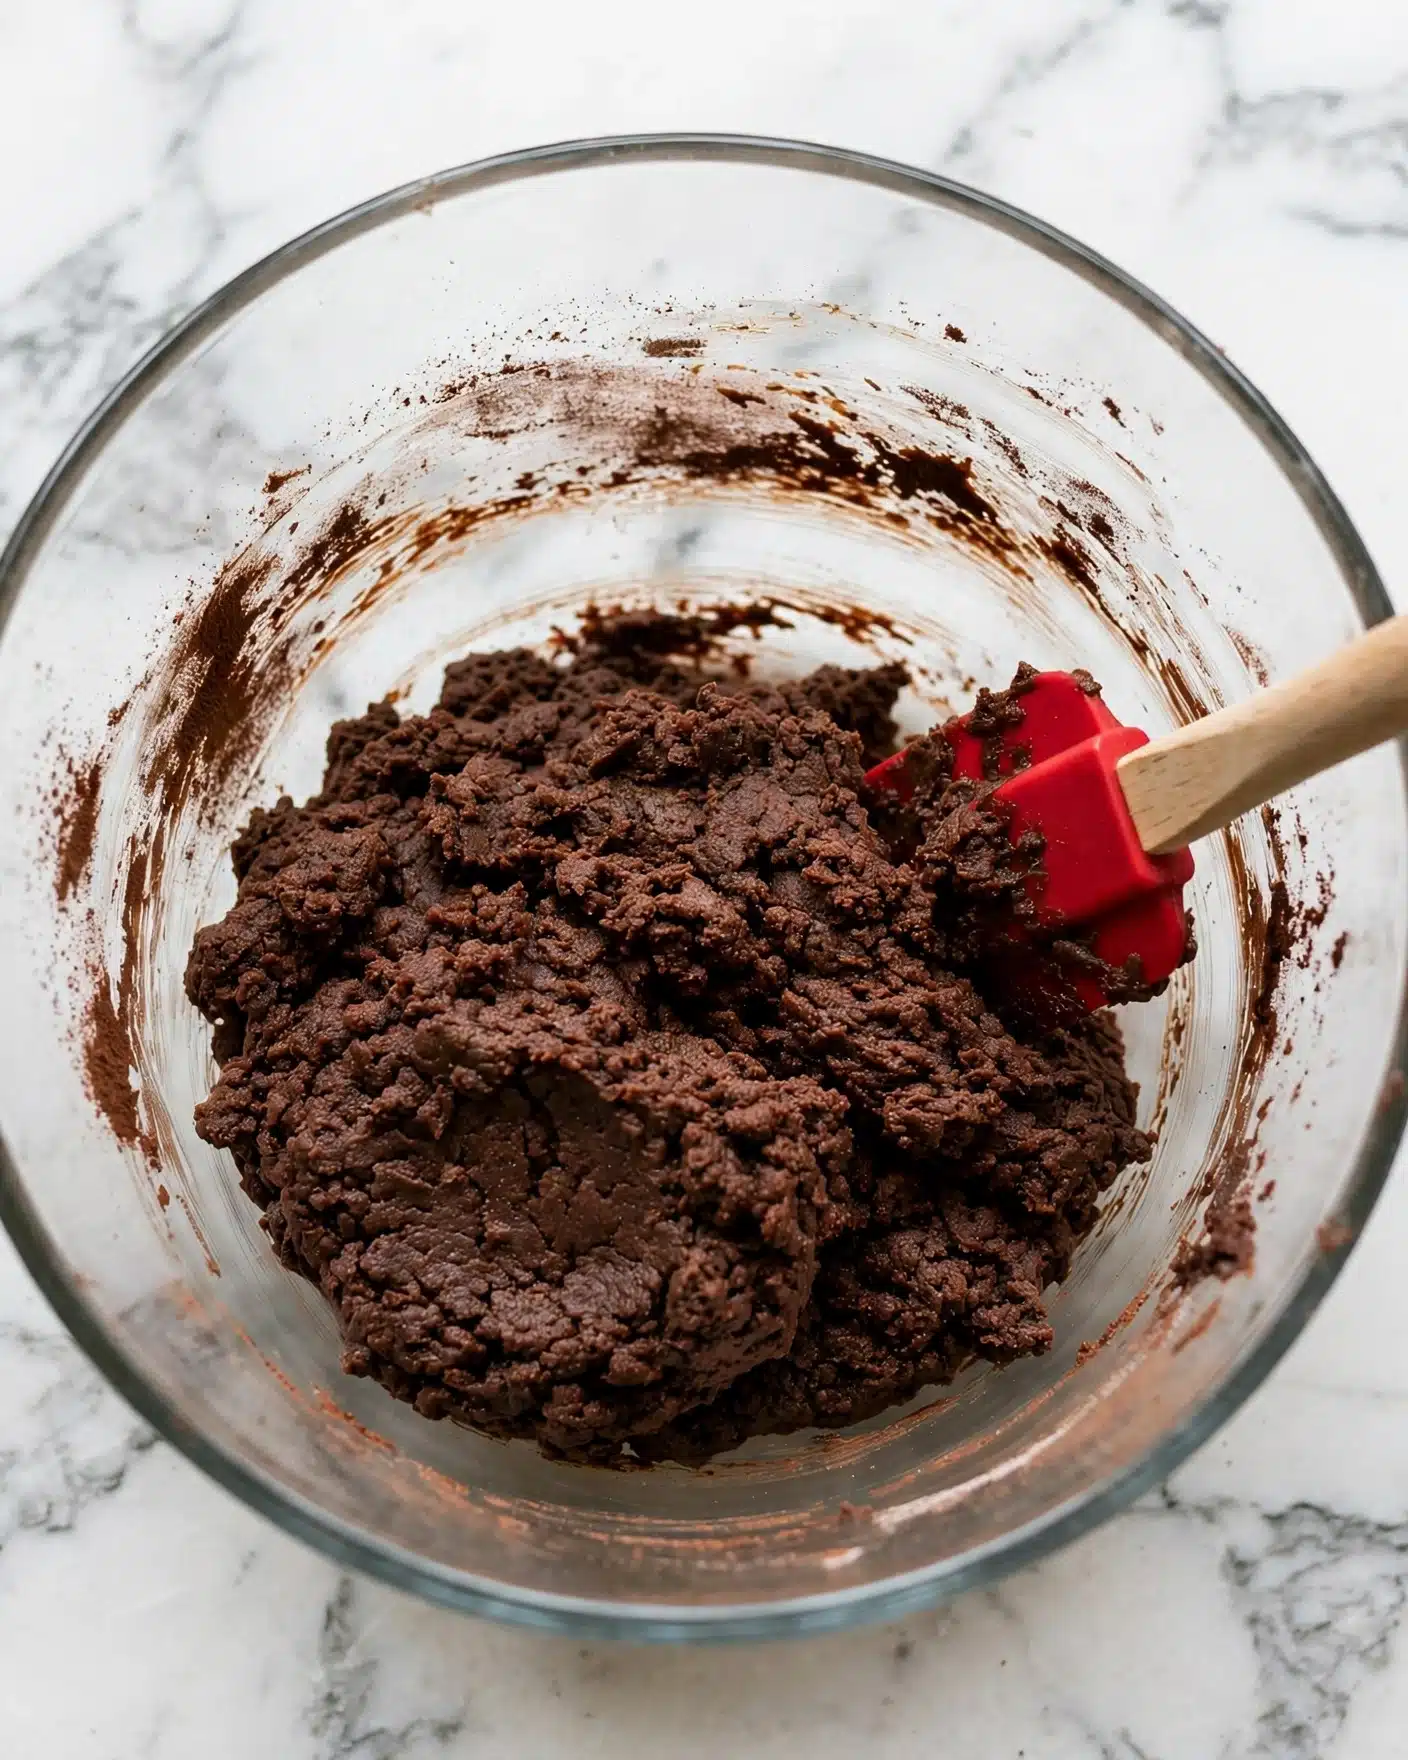
Step 3: Now add the almond flour, unsweetened cocoa powder, baking soda, coconut sugar, and salt. Stir everything together until the mixture is consistent and smooth. Finally, gently fold in the chocolate chips to disperse them evenly throughout the dough.
Step 4: Using a medium-sized cookie scoop or spoon, drop tablespoon-sized dollops of the dough onto your prepared baking sheet. Flatten each a little with the back of a spatula so they bake evenly. You should get about 18 cookies from this batch.
Step 5: Bake the cookies for 12 to 15 minutes. You want to wait until the edges start to brown slightly and the cookies feel set when you gently touch them. This timing ensures they stay soft and chewy inside.
Step 6: Let the cookies cool on the baking sheet for about 10 minutes before transferring to a wire rack to cool completely. Patience here is key because decorating warm cookies won't give the best results.
Step 7: While the cookies cool, melt your white chocolate chips in a microwave-safe bowl. Heat in 30-second intervals, stirring each time until completely smooth. Pour the melted chocolate into a small plastic bag and cut a tiny slit at the tip to create a piping bag.
Step 8: Carefully pipe white chocolate across the cookies in crisscrossing lines that look like mummy bandages. Before the white chocolate hardens, gently press the candy eyeballs onto each cookie using some of the melted chocolate as "glue."
Servings and Timing
This recipe makes about 18 medium-sized cookies, perfect for sharing at a party or keeping some for yourself because trust me, you won’t want them to last long! Prep time is around 15 minutes, with 12 to 15 minutes needed to bake. Make sure to set aside about 10 minutes of cooling time before decorating and additional time for the white chocolate to set. Altogether, you can expect the whole process to take about 40-50 minutes from start to finish.
How to Serve This Chocolate Mummy Cookies Recipe
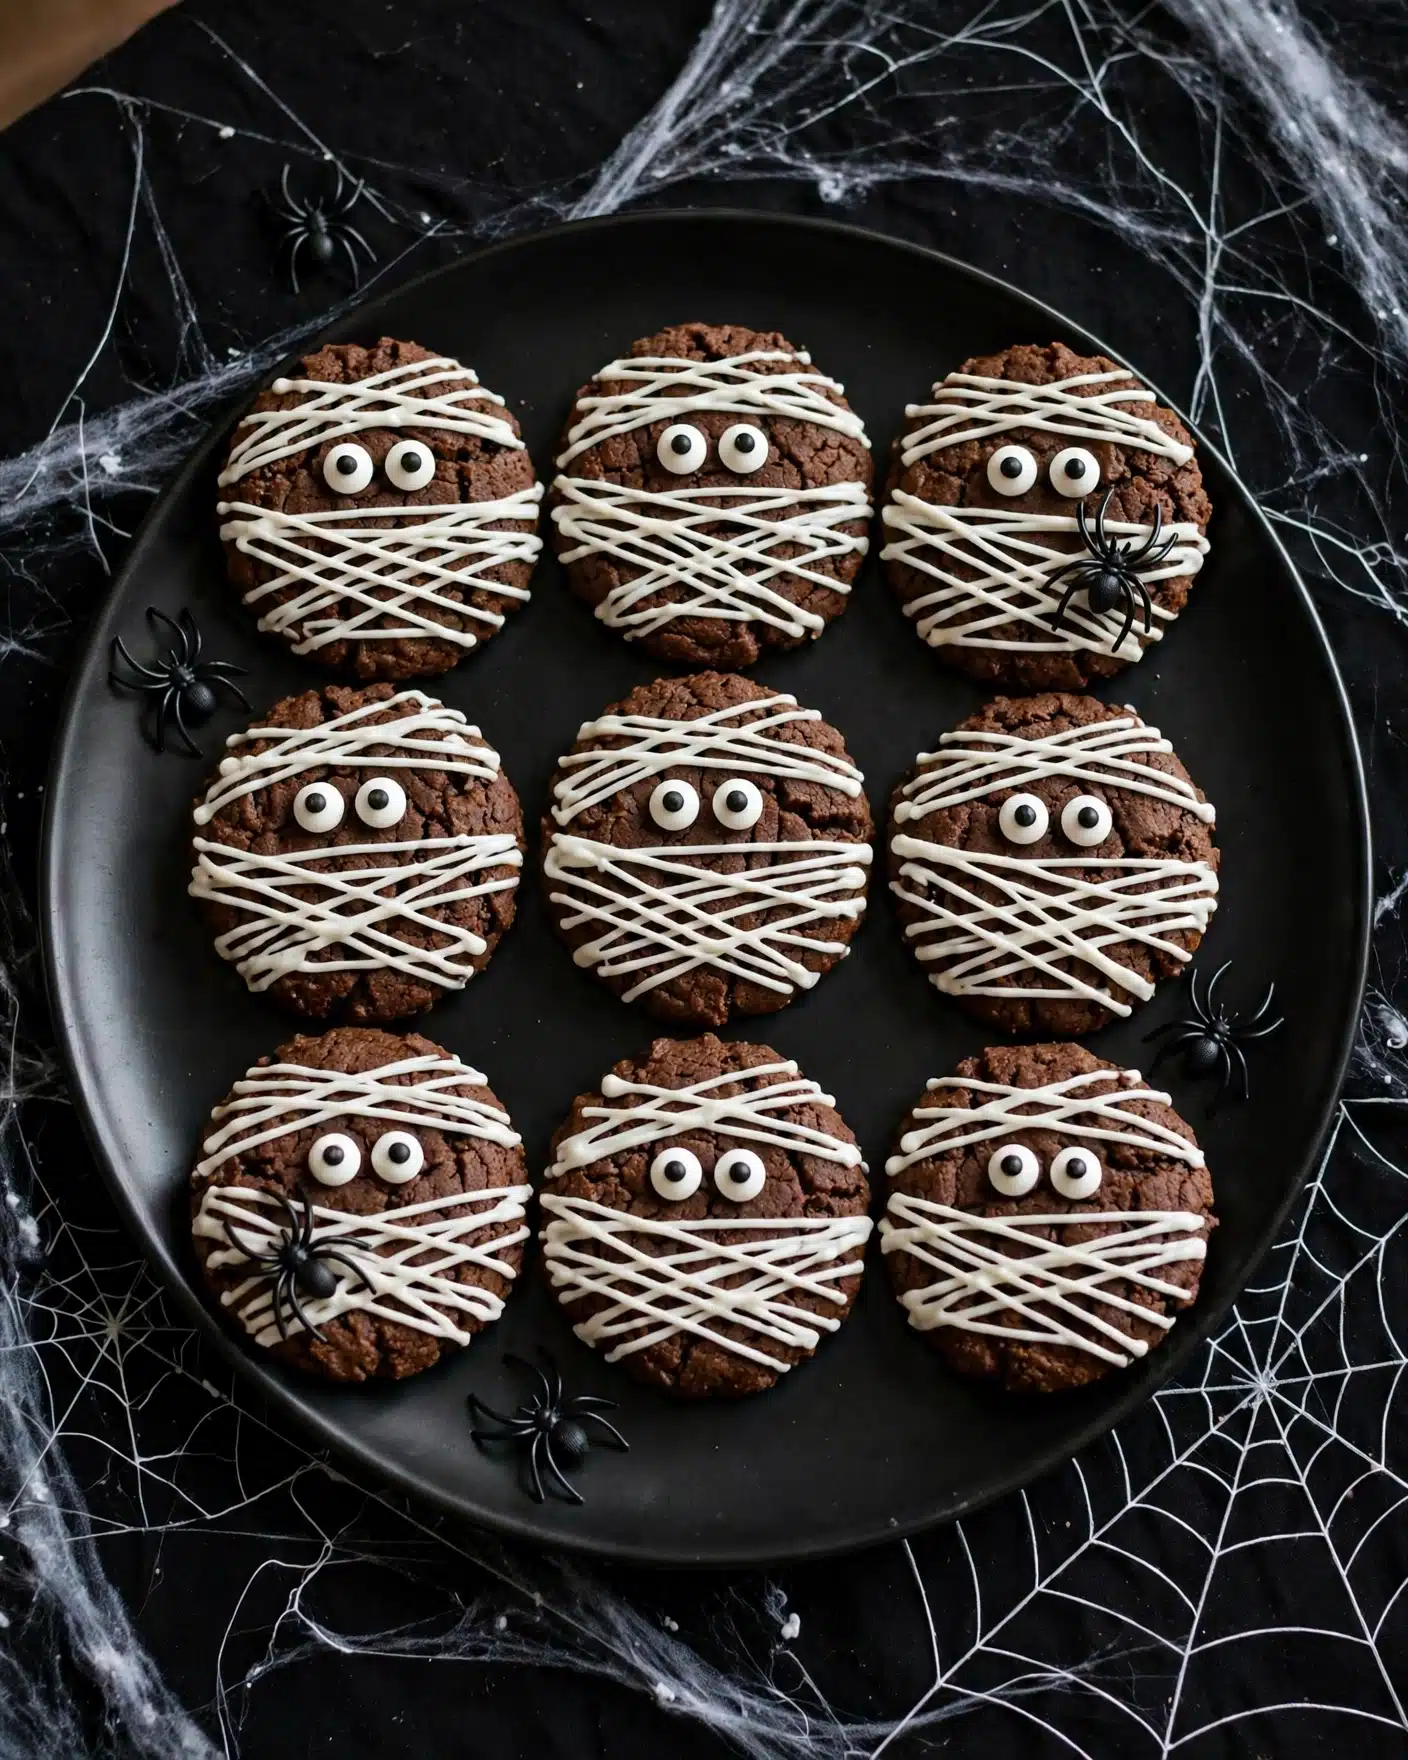
When I serve these Chocolate Mummy Cookies, I love presenting them on a festive platter surrounded by other Halloween treats like pumpkin spice cupcakes or caramel apples, adding to the seasonal vibe. They’re fantastic at room temperature, where the texture is soft but the chocolate chips remain slightly melty, giving every bite a nice contrast.
If you want to make them an impressive centerpiece, try arranging the cookies on a dark tray and sprinkle some edible glitter or colored sugar around for a magical effect. For a party, I like to provide small paper bags or boxes so guests can take a few home—these cookies travel well and make adorable gifts!
While they shine at Halloween, you don’t have to restrict these to just one occasion. I often make them during cozy weekend afternoons or for a fun family dessert after dinner, warming them slightly to bring out the peanut butter aroma further. They pair wonderfully with a glass of cold milk or your favorite non-dairy milk alternative, rounding out a comforting treat.
Variations
I’ve played around with this Chocolate Mummy Cookies Recipe in lots of ways depending on what I have in the pantry or dietary needs. For a nut-free option, swapping the peanut butter with sunflower seed butter works beautifully while keeping that creamy texture intact. You can also try other nut butters like almond or cashew to tweak the flavor sophistication.
If you want to make this gluten-free (which it already largely is thanks to almond flour) and vegan, simple adjustments like using a flax "egg" substitute instead of regular eggs and vegan white chocolate chips will do the trick. I recommend using a bit more almond flour if your dough feels too wet after substituting eggs.
For a flavor twist, adding a pinch of cinnamon or chili powder to the batter creates a subtle warmth that enhances the chocolate depth. You can also switch out the coconut sugar for maple syrup if you prefer a different sweetness profile, just reduce almond flour slightly to compensate for the extra moisture. If you’re short on time, baking the cookies a little longer at a lower temperature can give them a crispier edge, though I personally love them soft and chewy.
Storage and Reheating
Storing Leftovers
Once cooled and decorated, I store the leftover Chocolate Mummy Cookies in an airtight container lined with parchment paper to prevent sticking. They keep well at room temperature for up to 3 days, maintaining both their texture and flavor. If you want them to last longer, I recommend refrigerating them, but be sure to bring them back to room temperature before serving so they soften up nicely.
Freezing
Freezing these cookies is absolutely possible and I often do it to keep a stash ready. I place the cookies in a single layer on a baking sheet first and freeze until firm, then transfer them to a freezer-safe container or zip-top bag with parchment paper between layers to prevent sticking. They can be frozen for up to 3 months. When you’re ready to enjoy, thaw them at room temperature to preserve their chewy texture and carefully redo the white chocolate decoration if needed.
Reheating
To reheat, I prefer gently warming the cookies in a microwave for about 10 seconds or heating in an oven at 300 degrees Fahrenheit for 5 minutes. This revives the softness and helps melt any chocolate chips inside just enough for a delightful gooey center. Avoid overheating as it can dry the cookies out or cause the white chocolate decorations to lose their charm. Reheating in a toaster oven works great too and keeps them tasting freshly baked.
FAQs
Can I use regular all-purpose flour instead of almond flour?
Yes, you can substitute all-purpose flour, but it will change the texture slightly. Almond flour adds a moist, tender crumb while regular flour may create a denser cookie. If you do substitute, start with the same amount and adjust as needed if the dough feels too stiff or dry.
Are these cookies gluten-free?
Yes! This Chocolate Mummy Cookies Recipe is naturally gluten-free since it uses almond flour. Just make sure all your other ingredients, like chocolate chips and baking soda, are gluten-free certified to avoid cross-contamination.
Can I decorate these cookies without using white chocolate?
Definitely. You can use white candy melts or even a simple frosting made from powdered sugar and a little milk to create the mummy bandages. Just make sure the frosting is thick enough to pipe neatly and sets properly.
Can I make these cookies ahead of time?
Absolutely! The cookie dough can be made and refrigerated for up to 24 hours before baking, which can even help deepen the flavors. You can also bake the cookies and decorate them on the day you want to serve for the best look and freshness.
What if I don’t have edible candy eyeballs?
No worries! You can substitute with small dots of melted chocolate or draw eyes using an edible food marker after the white chocolate has hardened. Another fun option is to use mini chocolate chips or colorful sprinkles to create playful eyes.
Conclusion
I can’t recommend this Chocolate Mummy Cookies Recipe enough if you want to bring some festive fun and rich flavor into your kitchen. They’re delightfully simple to make, wonderfully adaptable, and an absolute hit with everyone who tries them. Whether it’s for a spooky celebration or just a cozy day at home, these cookies will quickly become one of your favorites to bake and share. I hope you have as much fun making and eating them as I do!
PrintChocolate Mummy Cookies Recipe

These Chocolate Mummy Cookies are a fun and festive treat perfect for Halloween or any spooky occasion. Made with creamy peanut butter, almond flour, cocoa powder, and sweetened with coconut sugar, these cookies are both rich and slightly healthier than traditional chocolate cookies. Decorated with melted white chocolate and candy eyeballs to resemble mummies, they’re as delightful to look at as they are to eat.
- Prep Time: 15 minutes
- Cook Time: 15 minutes
- Total Time: 40 minutes
- Yield: 18 cookies
- Category: Dessert, Snack
- Method: Baking
- Cuisine: American
- Diet: Gluten Free
Ingredients
Cookie Dough
- 1 cup creamy peanut butter or other nut butter
- 2 eggs
- 1 ½ teaspoons vanilla extract
- ½ cup almond flour
- ⅓ cup unsweetened cocoa powder
- 1 teaspoon baking soda
- ¾ cup coconut sugar
- ½ teaspoon salt
- ⅓ cup chocolate chips (Lily's recommended)
Mummy Decoration
- Edible candy eyeballs
- ½ (9 oz) bag white chocolate chips (Lily's recommended)
Instructions
- Preheat and prepare baking sheet: Preheat your oven to 375°F (190°C) and line a baking sheet with parchment paper or aluminum foil to prevent sticking and for easy cleanup.
- Mix wet ingredients: In a large bowl, combine the creamy peanut butter, eggs, and vanilla extract. Stir well until the mixture is smooth and fully combined.
- Add dry ingredients: To the wet mixture, add almond flour, unsweetened cocoa powder, baking soda, coconut sugar, and salt. Stir the mixture until smooth and well incorporated.
- Fold in chocolate chips: Gently fold in the chocolate chips to evenly distribute them throughout the cookie dough.
- Scoop and shape cookies: Using a medium-sized cookie scoop, drop tablespoon-sized portions of dough onto the prepared baking sheet. Flatten each slightly with the back end of a spatula to shape the cookies. Expect to get about 18 cookies.
- Bake: Place the baking sheet in the preheated oven and bake for 12 to 15 minutes or until the cookies are set and the edges begin to brown.
- Cool cookies: Remove the baking sheet from the oven and let the cookies cool on it for about 10 minutes. Then transfer them to a wire rack and allow them to cool completely before decorating.
- Melt white chocolate: Place the white chocolate chips in a small microwave-safe bowl. Microwave in 30-second intervals, stirring thoroughly after each, until fully melted and smooth.
- Prepare piping bag: Cut a small slit at the tip of a plastic baggy or piping bag and carefully pour in the melted white chocolate chips.
- Decorate cookies: Slowly pipe the melted white chocolate in lines across each cookie to mimic mummy bandages. Then use the melted chocolate to glue the edible candy eyeballs onto the cookies, creating the mummy look.
Notes
- Ensure cookies are completely cool before decorating to prevent white chocolate from melting or running.
- Use almond flour and coconut sugar as healthier alternatives to traditional flour and white sugar.
- Lily's brand chocolate chips are recommended for a lower sugar option, but any chocolate chips can be substituted.
- If you don’t have edible candy eyeballs, small white chocolate chips with a dot of melted dark chocolate can be used as an alternative.
- Store cookies in an airtight container at room temperature for up to 4 days, or refrigerate for longer freshness.


Leave a Reply